Getting Started with Zedu: Set Up, Organise, Invite and Run Your First Cohort
By Michael Abu ·
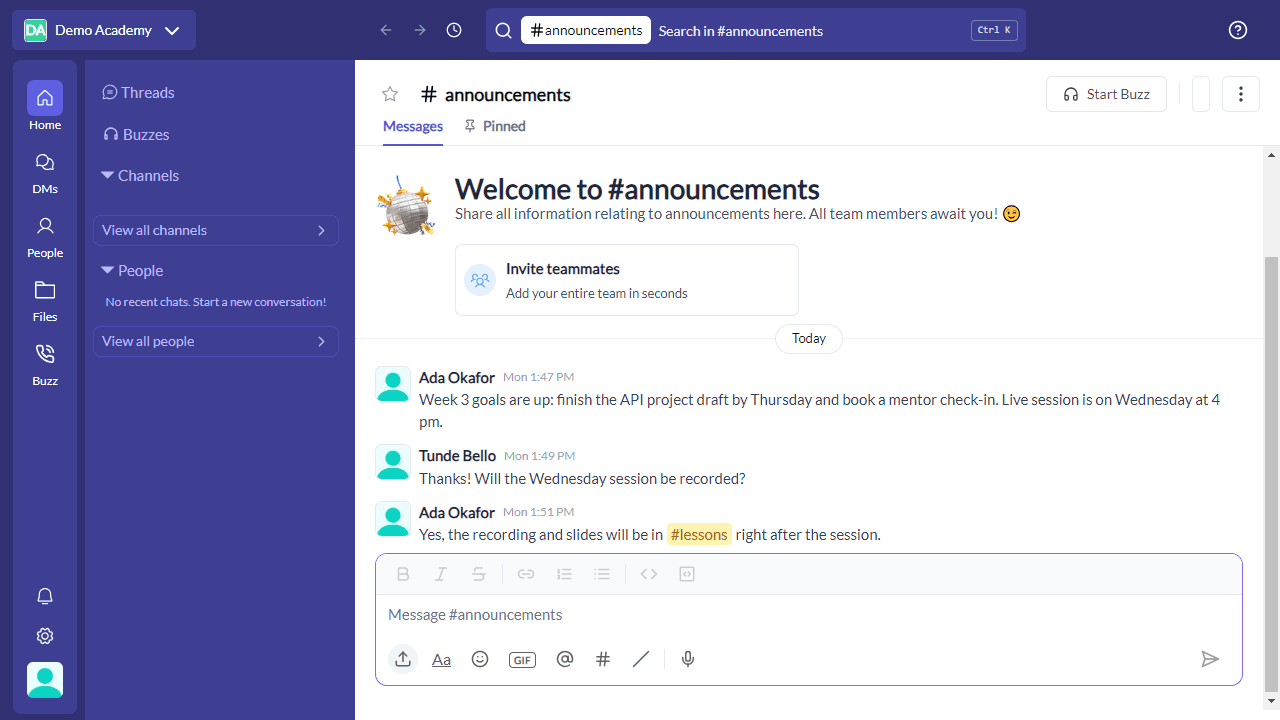
Running a cohort means a lot of moving parts: announcements, lessons, questions, projects and the people behind them. This tutorial walks you through setting all of that up in Zedu, from an empty account to a cohort that is up and running. It takes about five minutes to read, and each step shows the screen you'll see.
The screenshots use a sample organisation called Demo Academy. Your own names and channels will be different.
Step 1: Create your organisation
Your organisation is the home for your programme. Everything else (channels, people, files and calls) lives inside it.
- Sign up for Zedu and confirm your email.
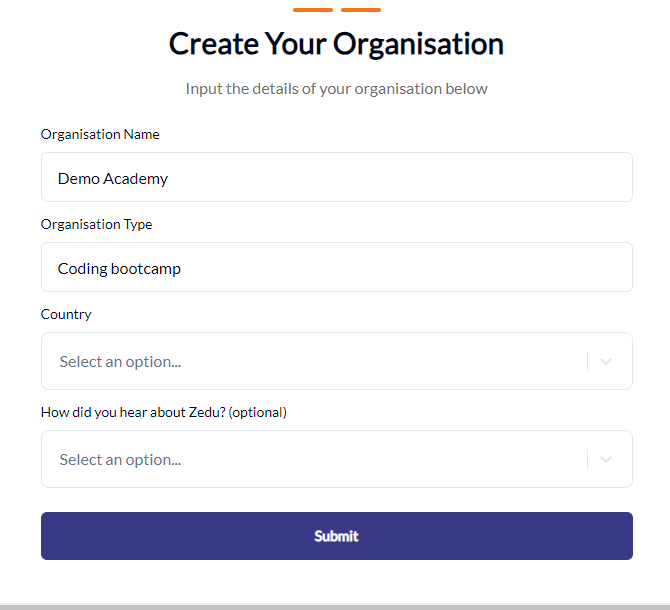
- On Create Your Organisation, enter an Organisation Name. Use the name learners will recognise, such as your school, bootcamp or programme.
- Under Organisation Type, say what your organisation does, for example "Coding bootcamp".
- Choose your Country, then select Submit.
Step 2: Organise your programme into channels
Channels give each part of your programme its own place, so announcements don't get lost among questions and project chat.
- From Home, open View all channels.
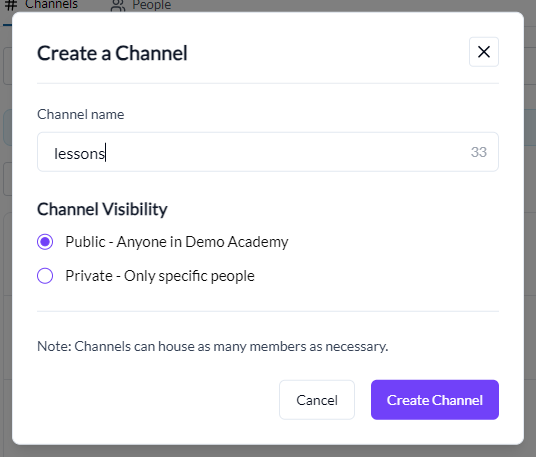
- Select New Channel to open Create a Channel.
- Enter a Channel name, such as announcements. Names are lowercase, use hyphens instead of spaces, and can be up to 40 characters.
- Under Channel Visibility, choose Public (anyone in your organisation can join) or Private (only specific people), then select Create Channel.
A simple starting set for a cohort:
| Channel | What it's for | Visibility |
|---|---|---|
| announcements | Weekly goals, schedule changes and deadlines | Public |
| lessons | Session notes, recordings and slides | Public |
| questions | Course questions, answered in threads | Public |
| projects-team-a | One channel per project team | Public or Private |
| staff | Instructors and mentors coordinating | Private |
For more ideas on naming and structure, see Organizing Courses with Channels.
Step 3: Invite your learners
- Select your organisation's name at the top left, then select Invite.
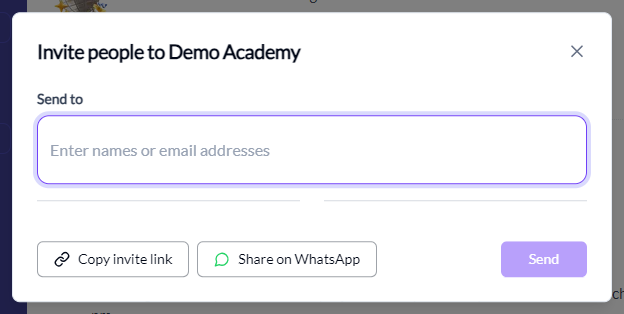
- In Invite people to your organisation, enter learners' names or email addresses under Send to, then select Send.
- To invite a whole class at once, select Copy invite link and post it wherever your learners already are, or use Share on WhatsApp.
Invite your mentors and co-instructors the same way, and add them to the #staff channel.
Step 4: Run the cohort day to day
With channels and people in place, the day-to-day work happens in a few familiar places:
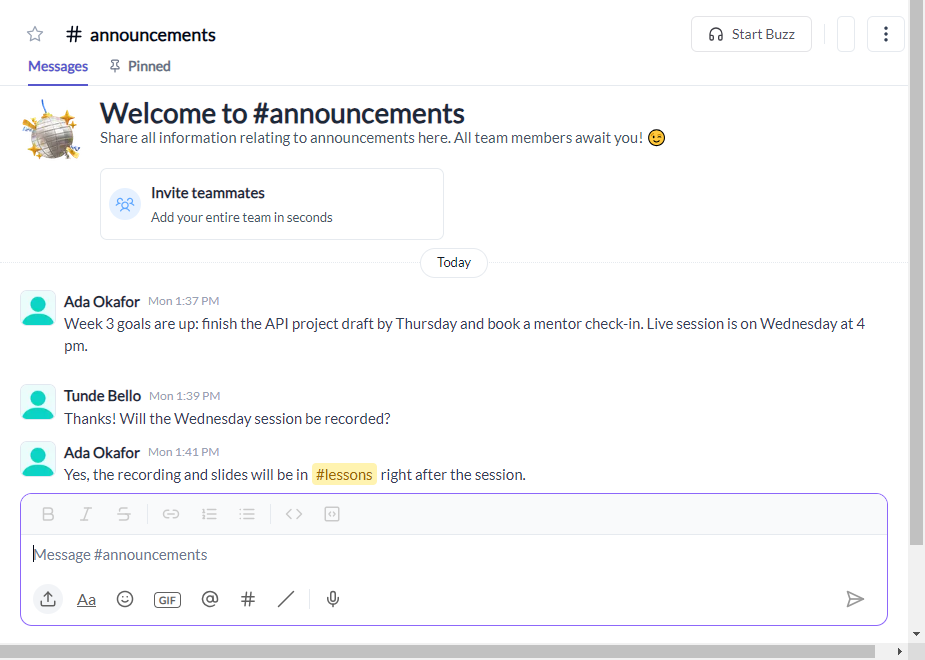
- Post announcements in #announcements so the week's goals and deadlines are always in one place.
- Answer questions in threads. Reply to a learner's message in a thread so the answer stays attached to the question, and find active conversations later under Threads.
- Meet live with Buzz. Select Start Buzz at the top of a channel to start a call with that channel, or open Buzz in the left sidebar.
- Share materials in #lessons, and find every shared file under Files in the left sidebar.
- Manage members under Settings, then Organisation, then User Management, to see your team and manage roles.
What to do next
- Pin your first announcement with the cohort's schedule and where to ask questions.
- Plan a weekly rhythm of goals and checkpoints. Managing Bootcamp Cohorts shows one that works.
- Get learners talking early with the tips in Running Active Class Discussions.
Keep reading and exploring
- Organizing Courses with Channels: choose and name the right channels for your course
- Managing Bootcamp Cohorts: structure, weekly rhythms and mentor coordination
- Running Active Class Discussions: get learners talking once the cohort is set up